Build your own neck contour milling jig
In this tutorial, I'll show you how to build a neck contour jig for guitar builders to shape custom neck profiles. This essential tool is perfect for custom guitar building and helps you create unique guitar necks with ease.
This article introduces you to my interpretation of a guitar neck contour jig inspired by Bill Scheltema's original idea. You can download the blueprints and SVG files below to build such a jig for your own guitar projects.
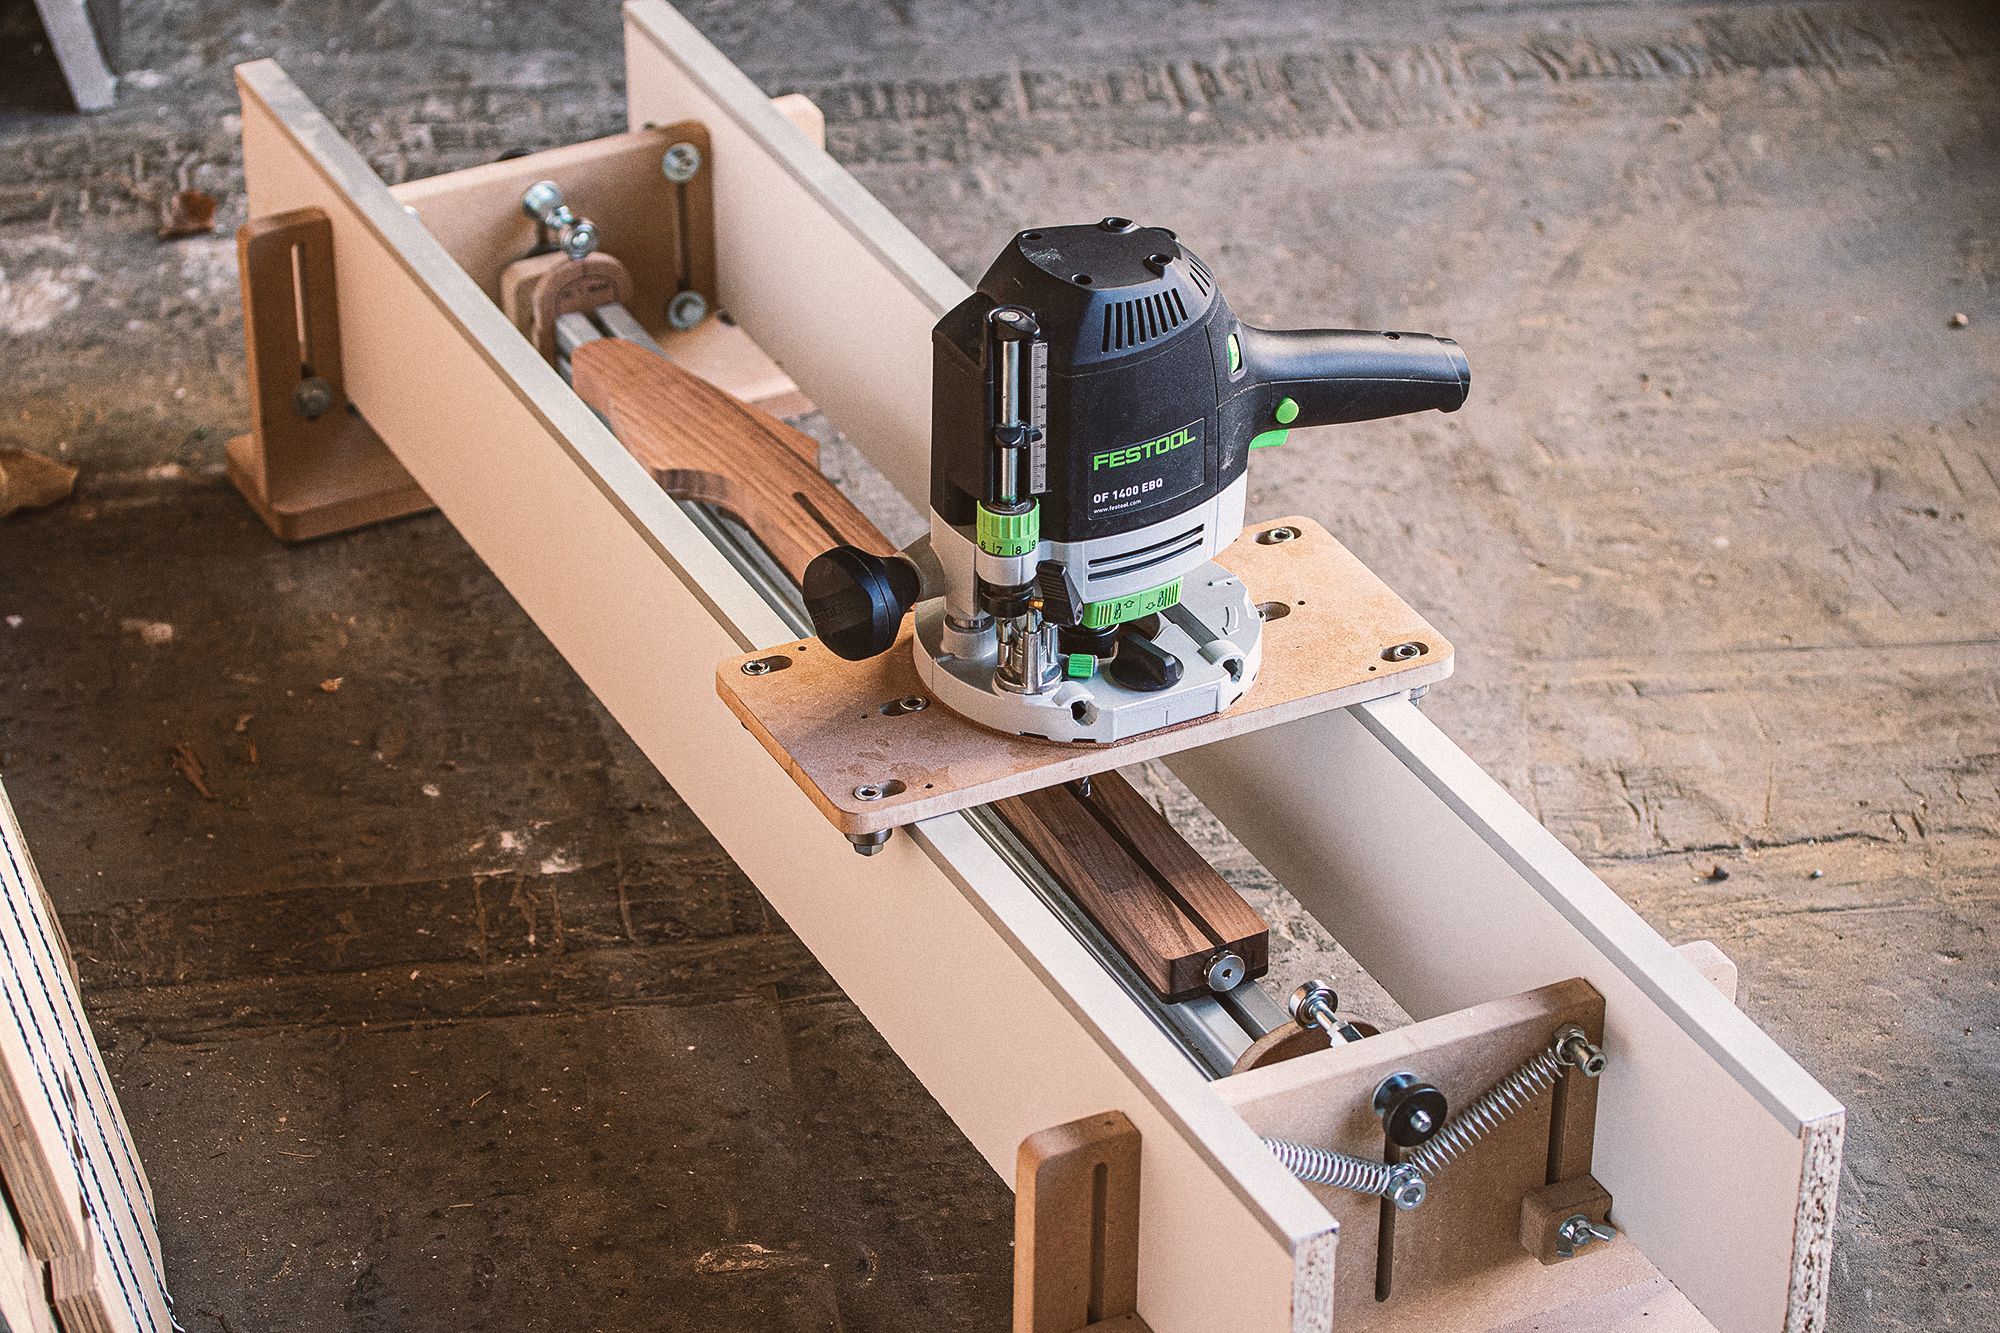
This neck contour template is designed to be easily adapted to different scales. It also shouldn't take up too much space in my workshop when not in use. Using a carriage that supports a plunge router, the depth of the router can be easily and, more importantly, precisely adjusted.
Neck support
The basic idea is based on a 40 x 40 mm aluminum construction profile as a center support that holds the guitar neck. The profile shown in the pictures has a length of 900 mm. If you need other scale lengths, you only need to make a new neck support with a different length and all other parts can be used unchanged.
The contour templates that guide the rotation of the neck rest are simply slid into the construction profile and can be easily replaced. The groove in the center of the profile holds it securely in place and does not allow any movement.
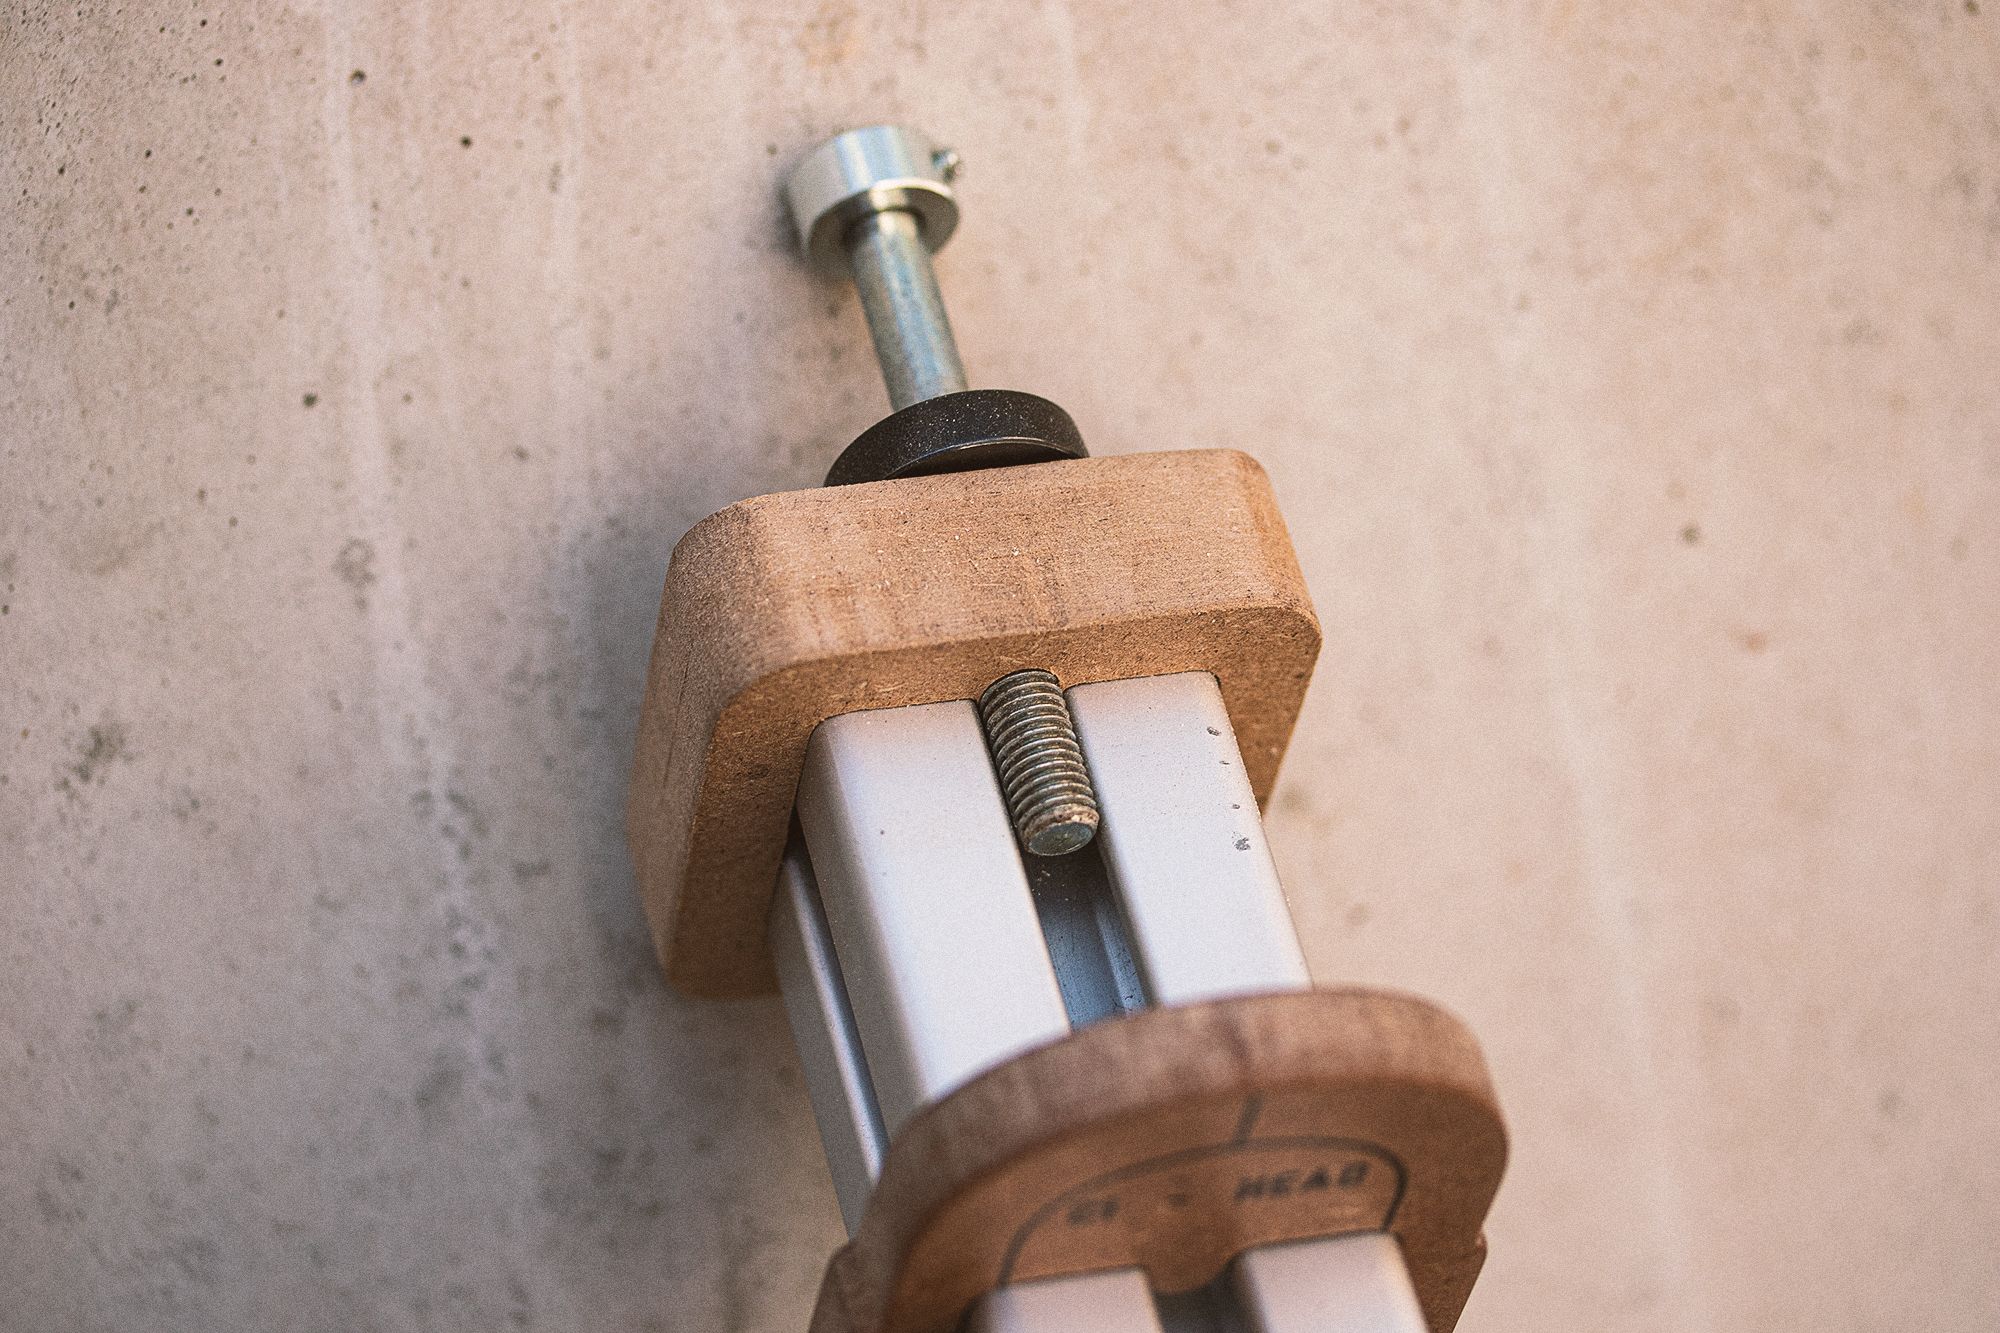
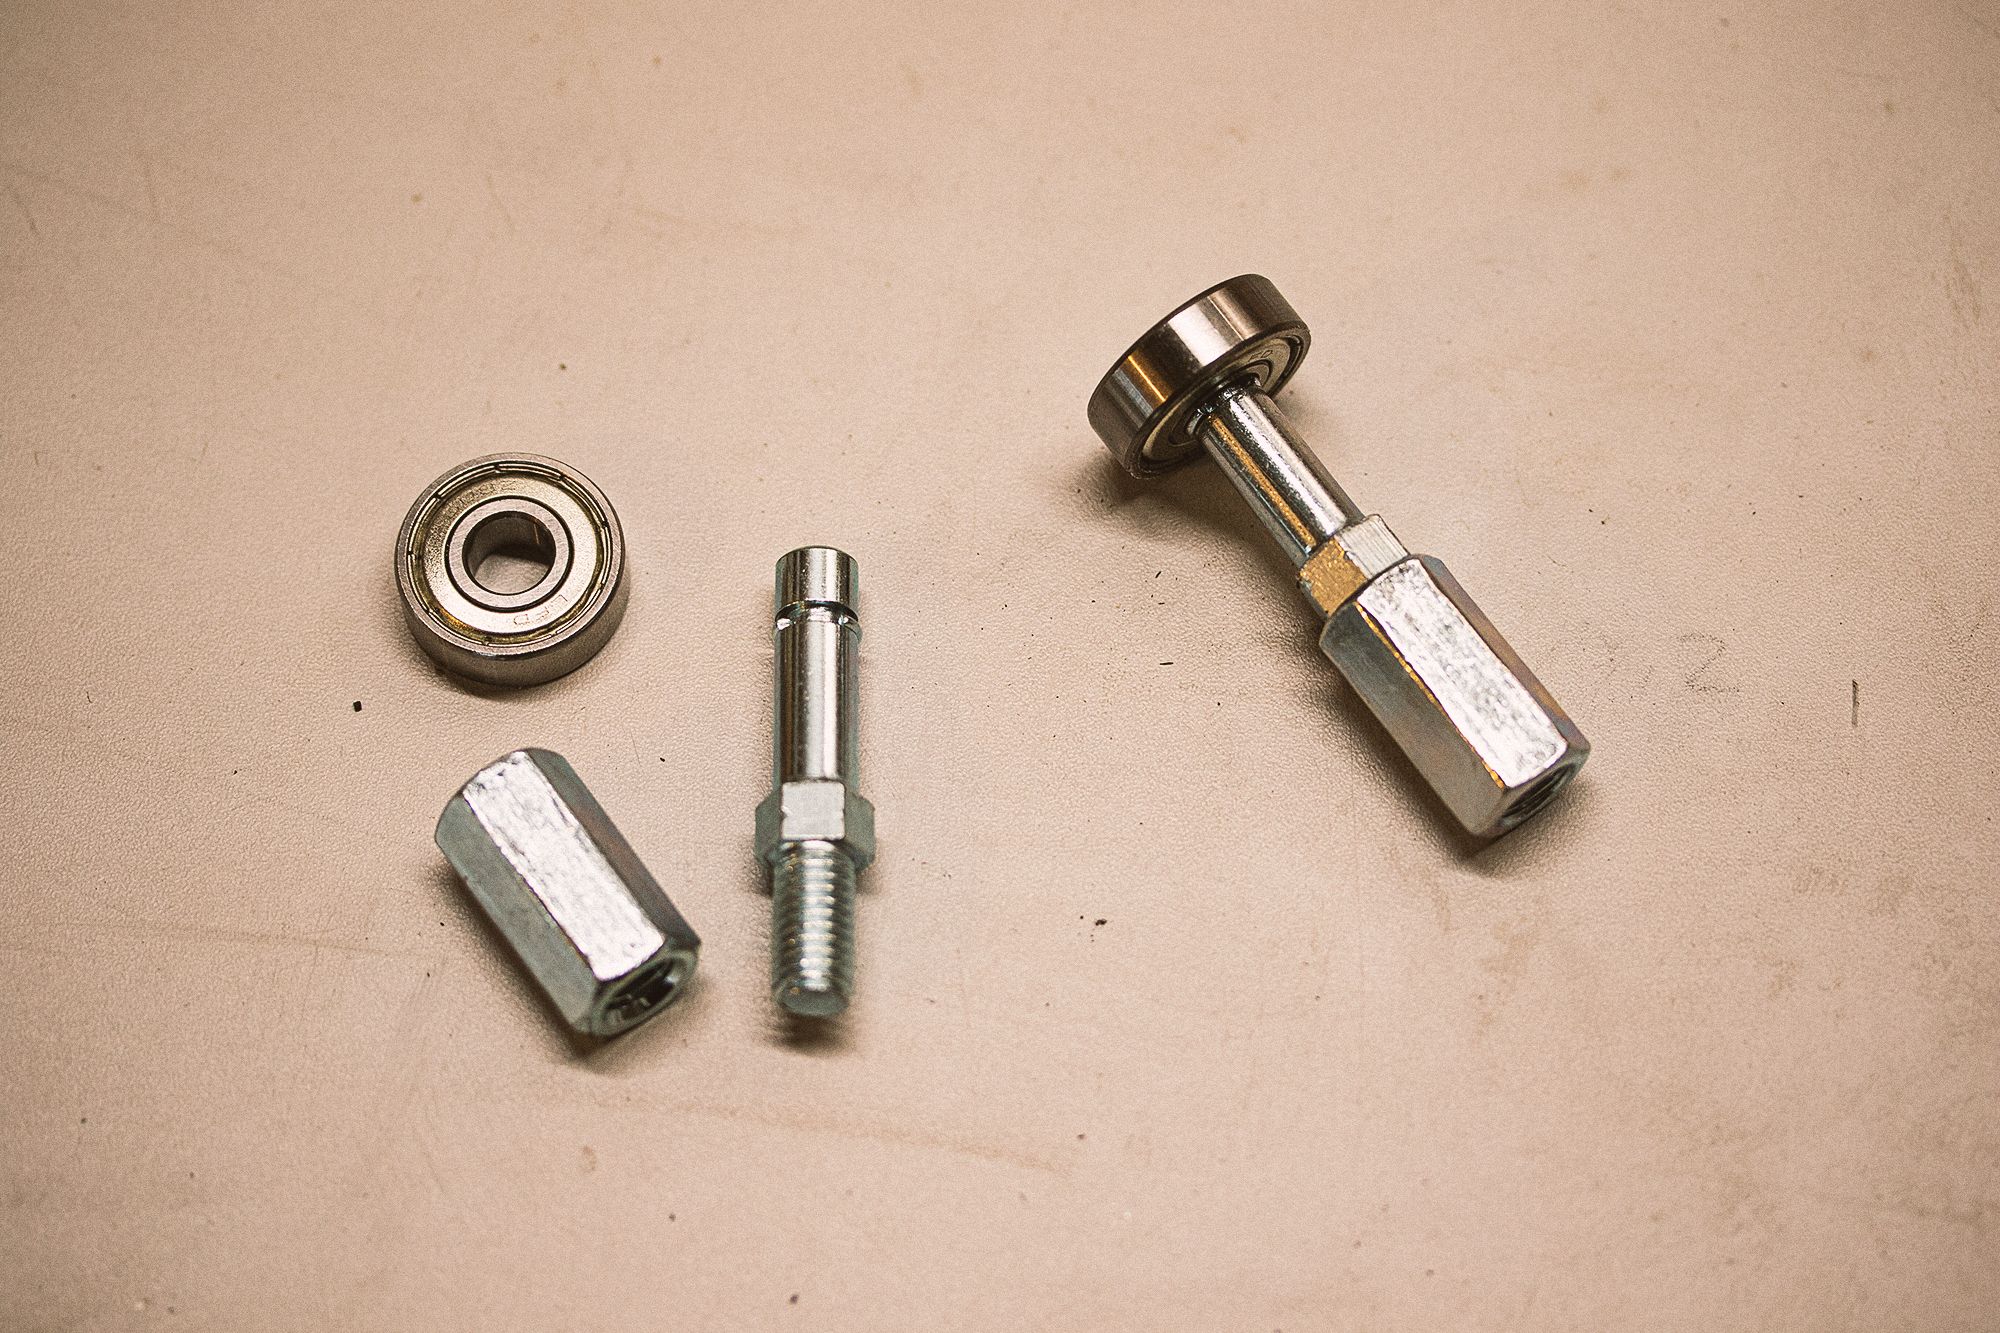
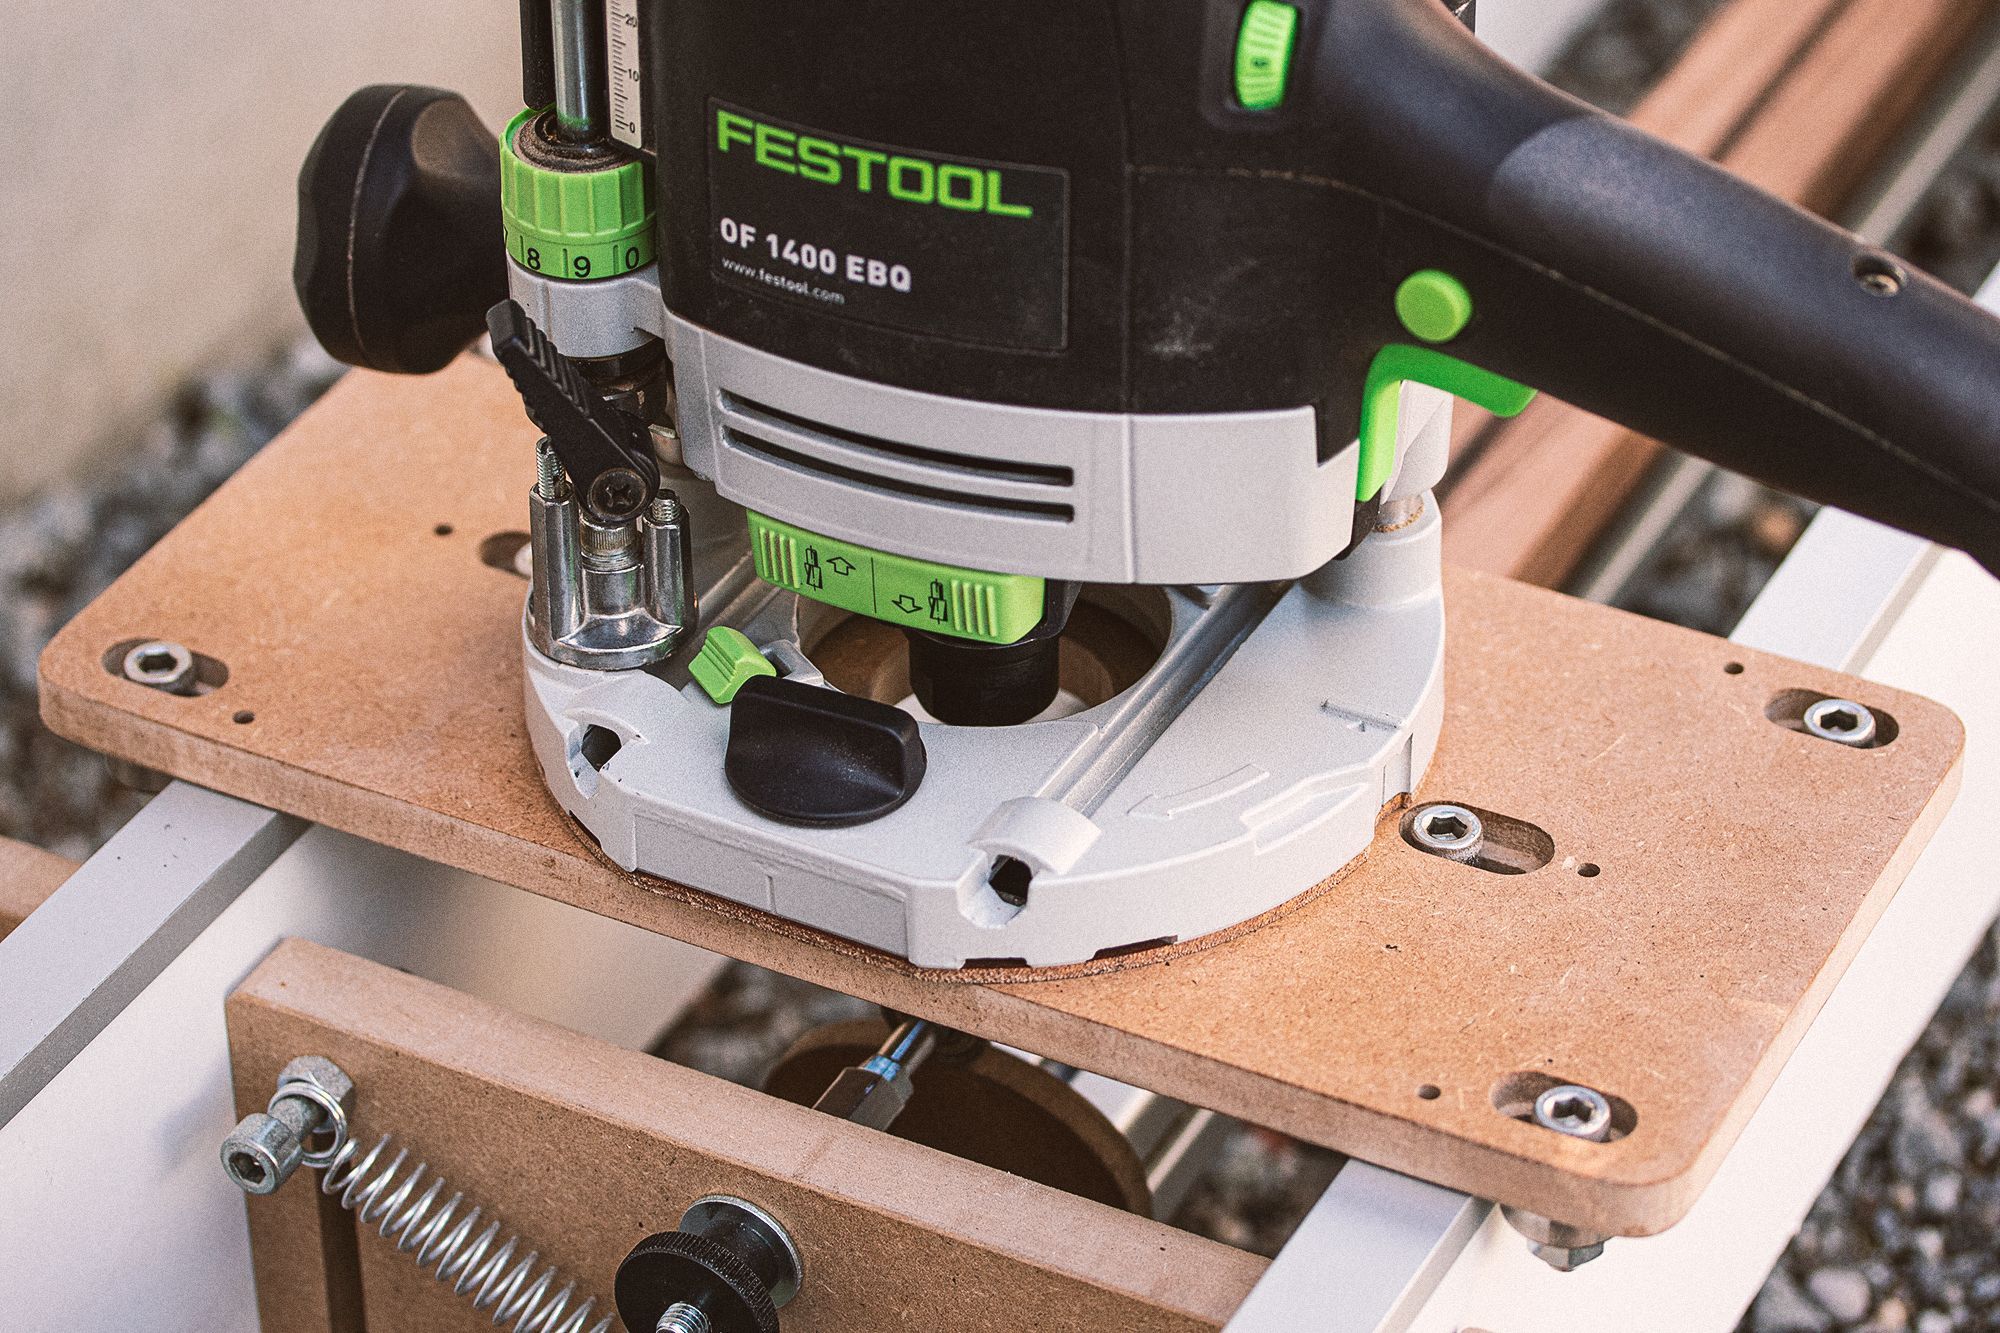
With the help of an adapter, the M8 machine screw is connected to the rod and thus serves as the axis of rotation. It is advisable to secure the thread of the machine screw with some glue so that it remains securely in place. Then cut off the head of the screw. Replace it with a set collar that prevents the springs from slipping.

Contour templates
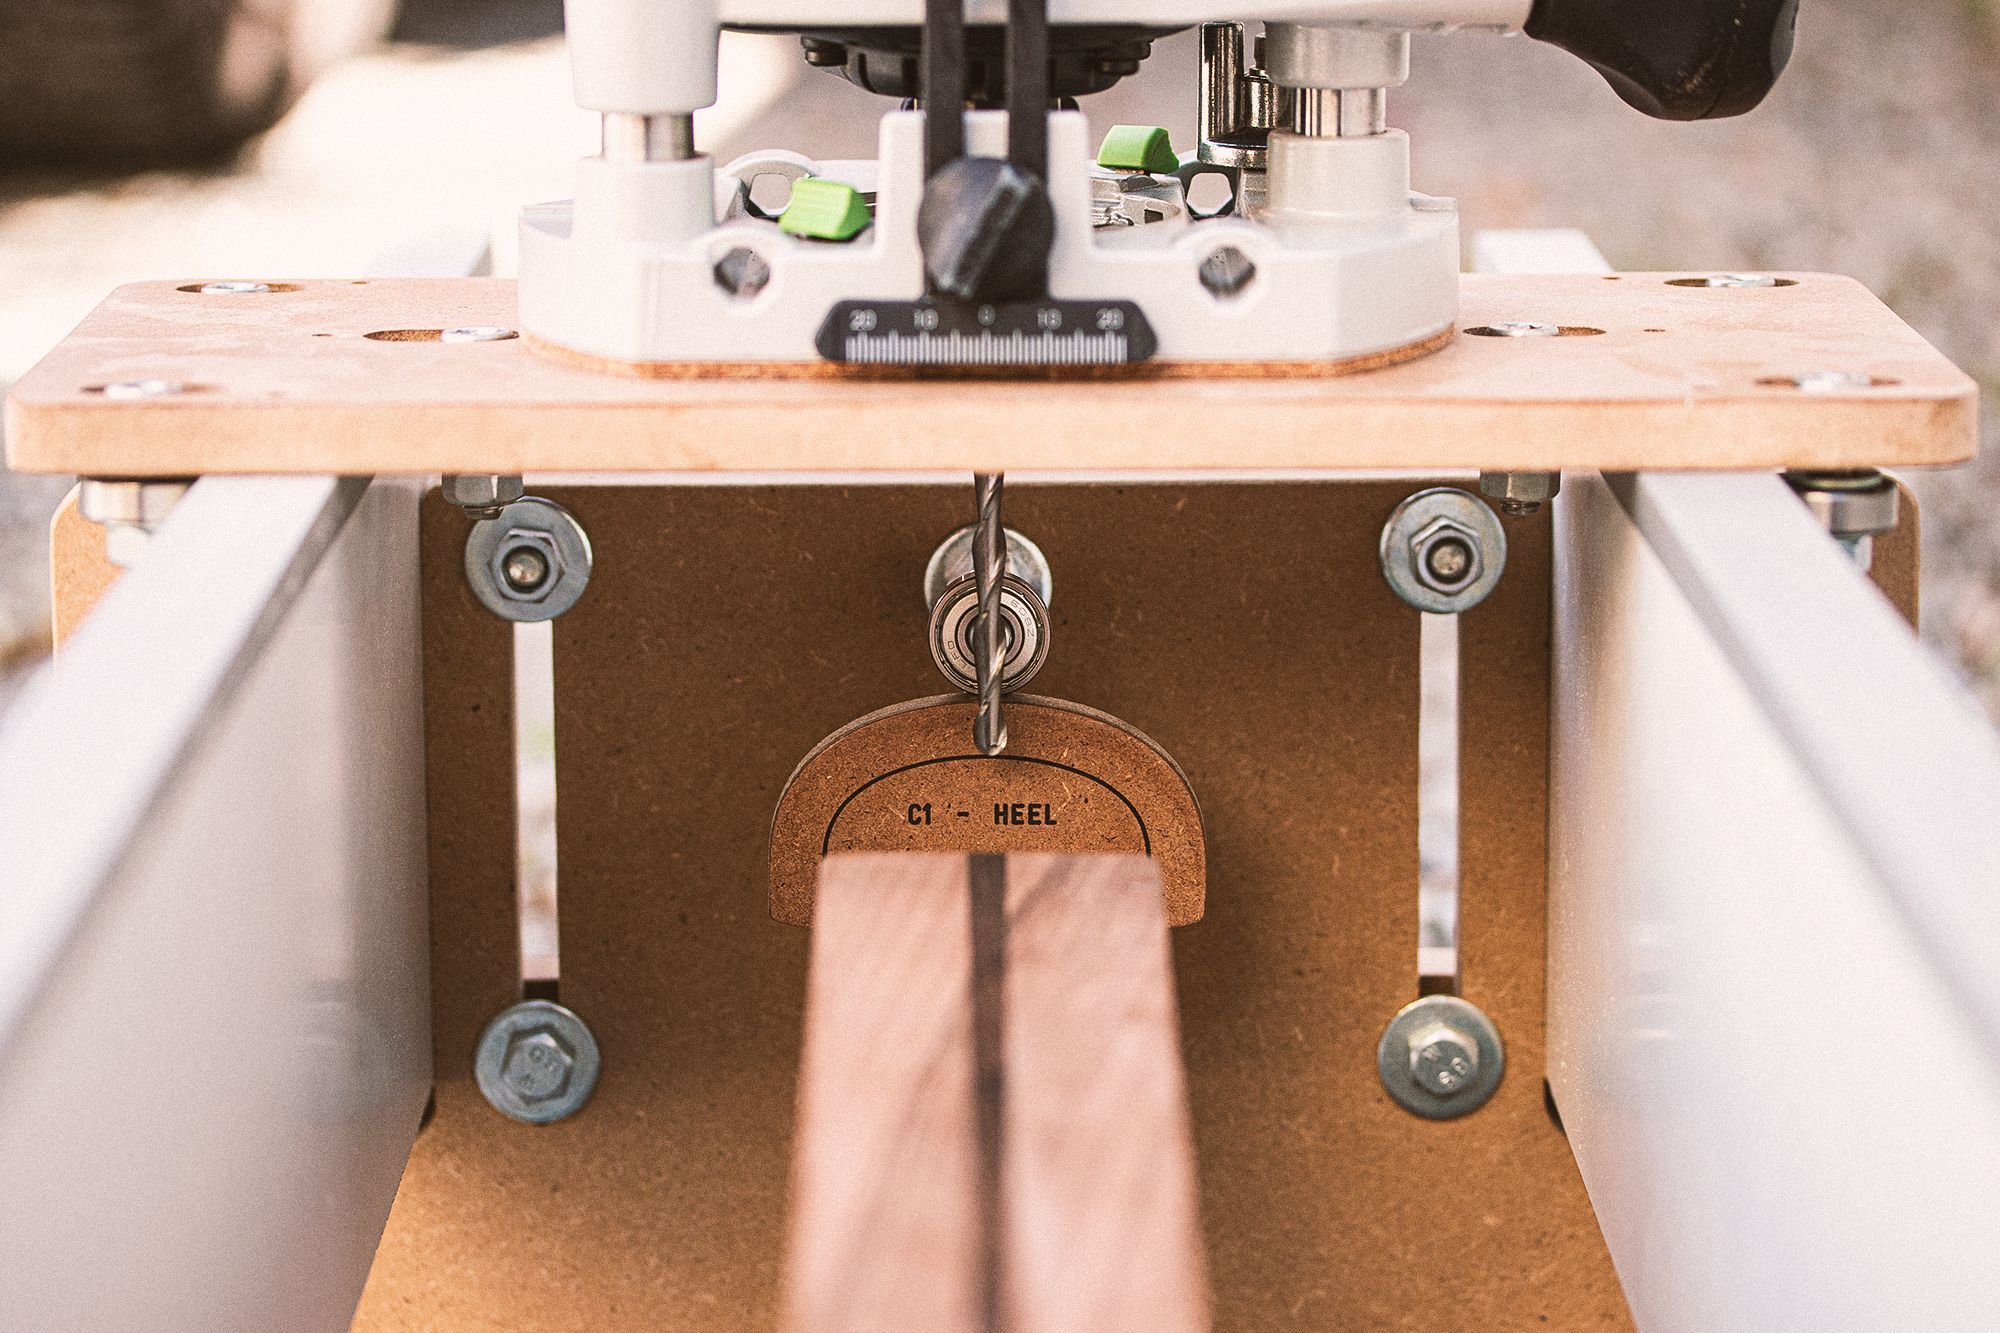
The inner cut-out of the contour template follows exactly the shape of the construction profile and is provided with a nose at the top to prevent turning. The profiles are simply pushed onto the support, no further fixture is required.
The outer contour of the profiles has an offset of 10mm from the target profile. For this reason I have also engraved the target profile in its original size. I use this as a reference line to accurately set the depth of the cutter.
The axis of rotation corresponds exactly in the center axis of the top of the aluminum profile and the profiles are designed for a neck thickness of 25mm.
When designing your own contour templates, you must keep in mind that the points at which the ball bearings scan the templates do not correspond to the positions of the neck contours on the guitar neck.
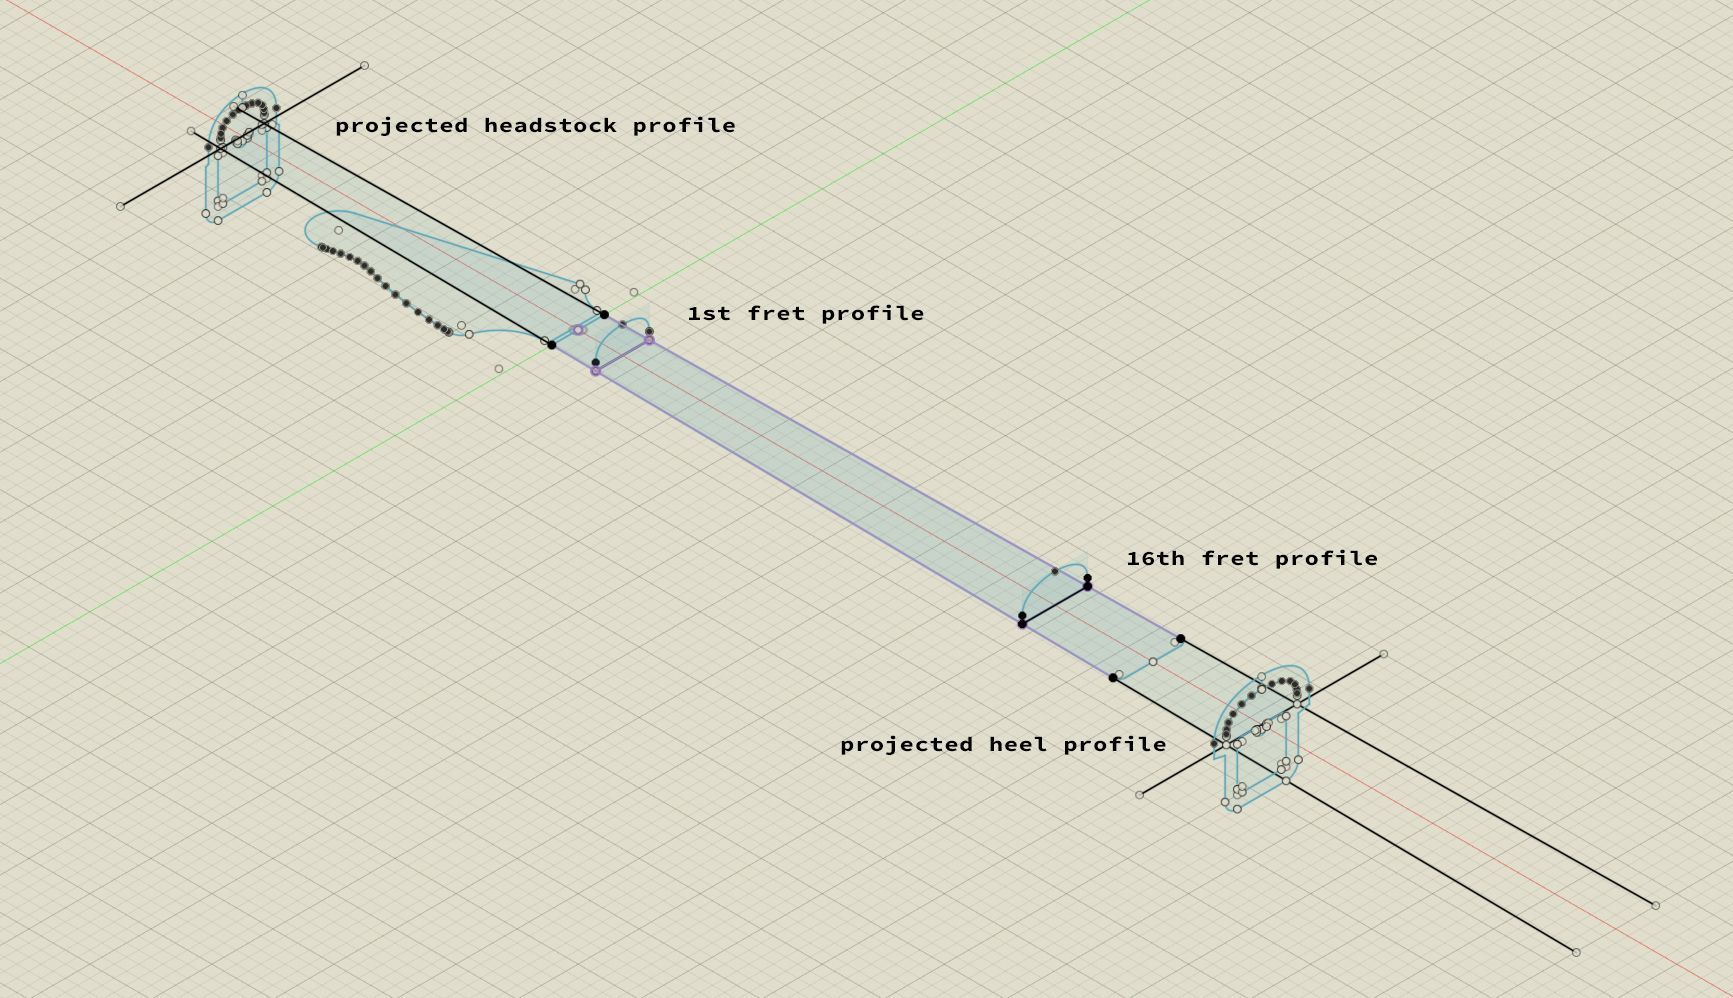
First, I drew contours for the 1st and 16th frets and then projected them onto the plane where the contour templates sit on the neck support. The taper must be continued in the process. This means that the projected profile on the headstock side is smaller than the reference profile at the first fret. Correspondingly, the projected profile on the heel side is larger than the reference profile at the 16th fret.

Carrier plates
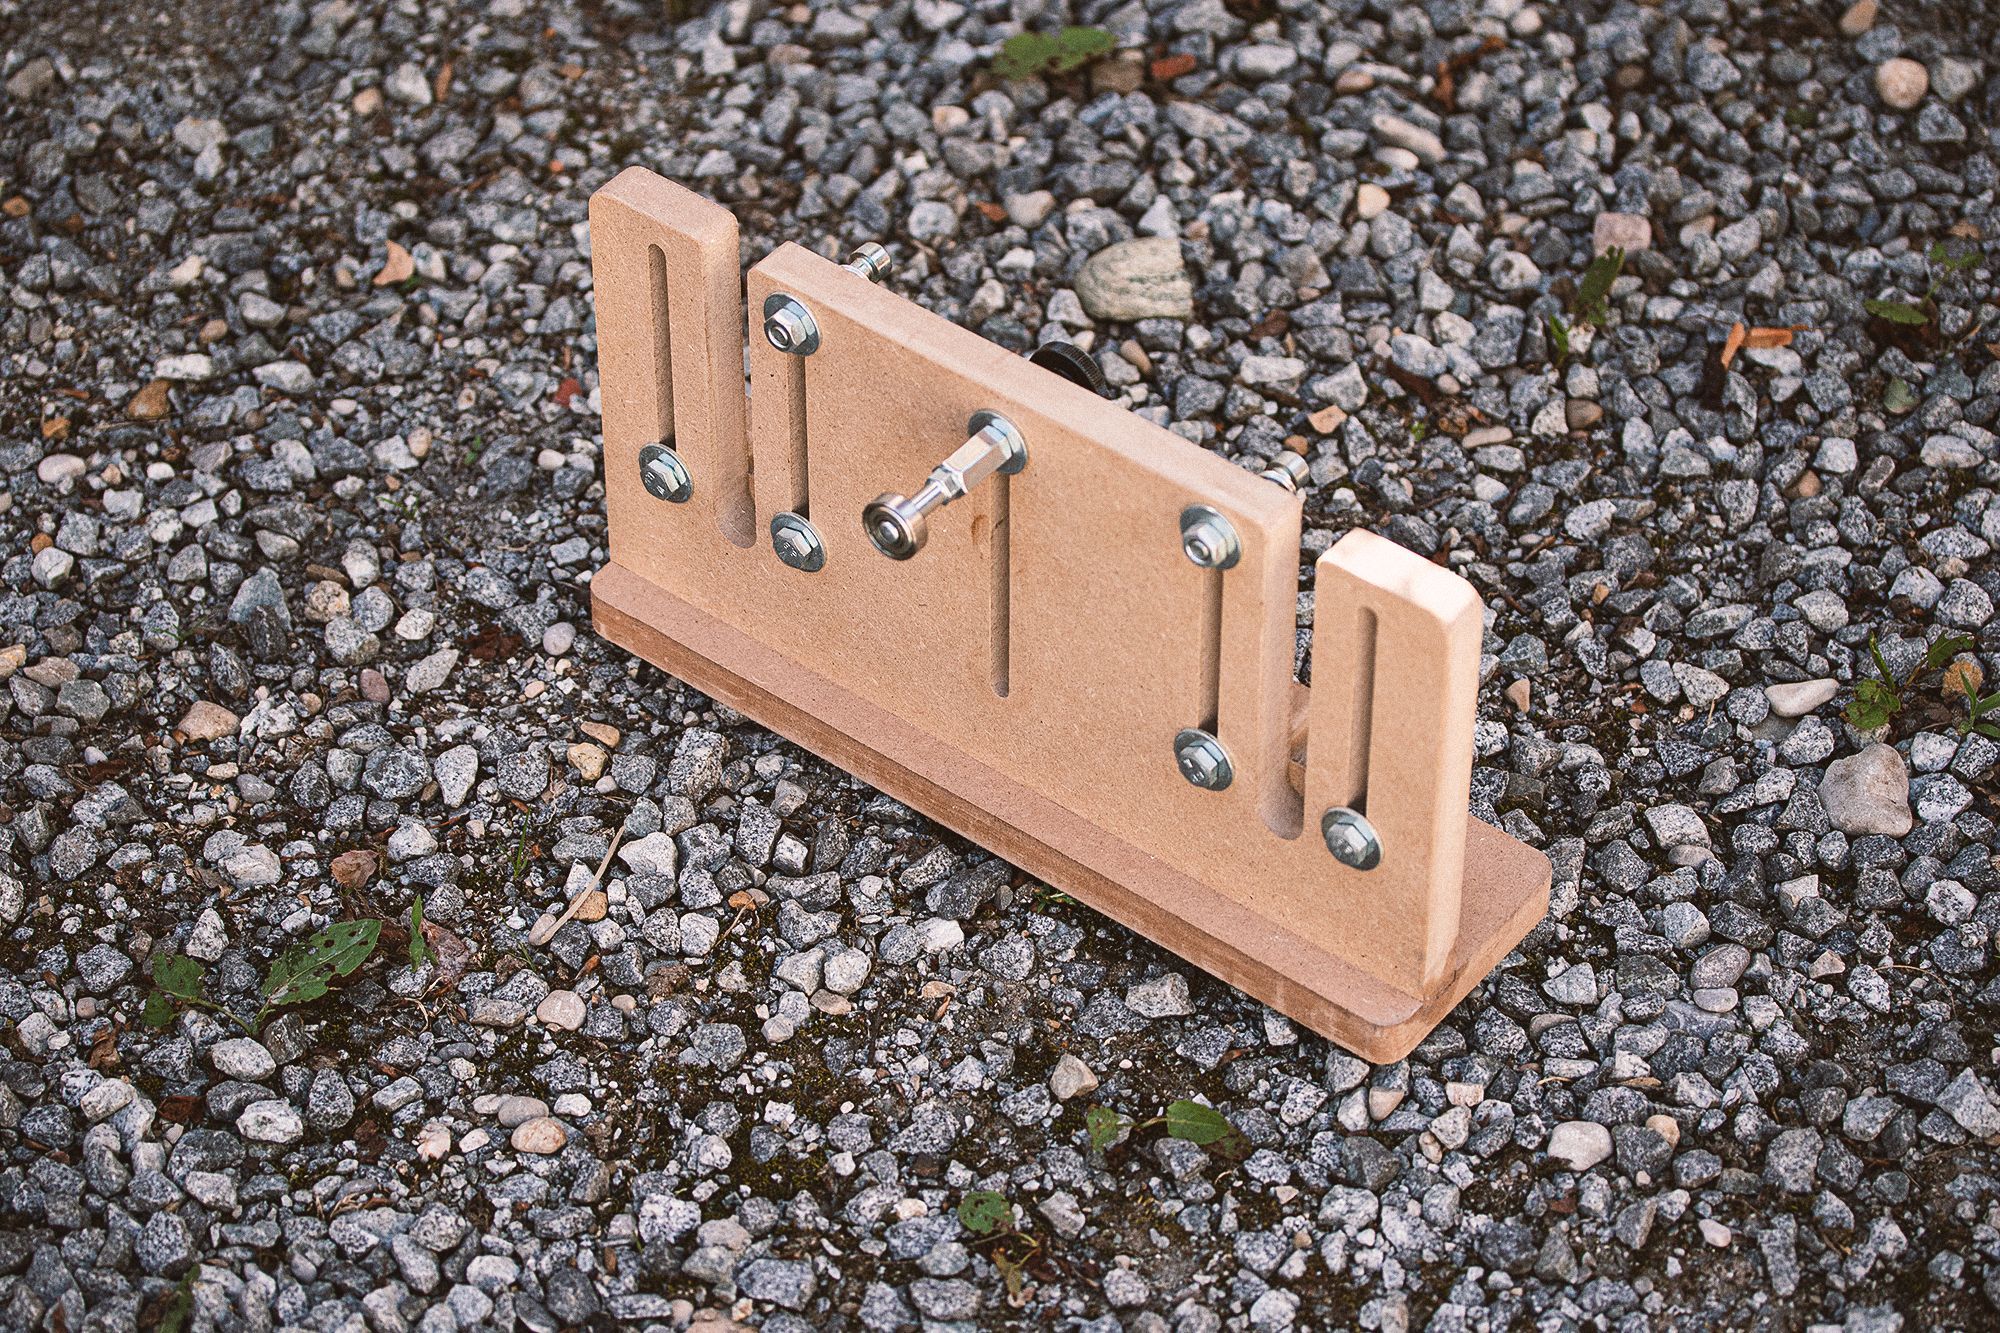
The carrier plate has 19 mm wide slots to accommodate the carriage rails. The slot in the middle serves on the one hand as a vertical guide for the axles neck support and on the other hand you can screw the ball bearing mechanism into this slot.
I tried to make this fixture as flexible as possible, so I added a clamping mechanism as a depth stop for the running stock rails. The initial setup takes a little longer because of this option, but it can be calibrated very accurately.
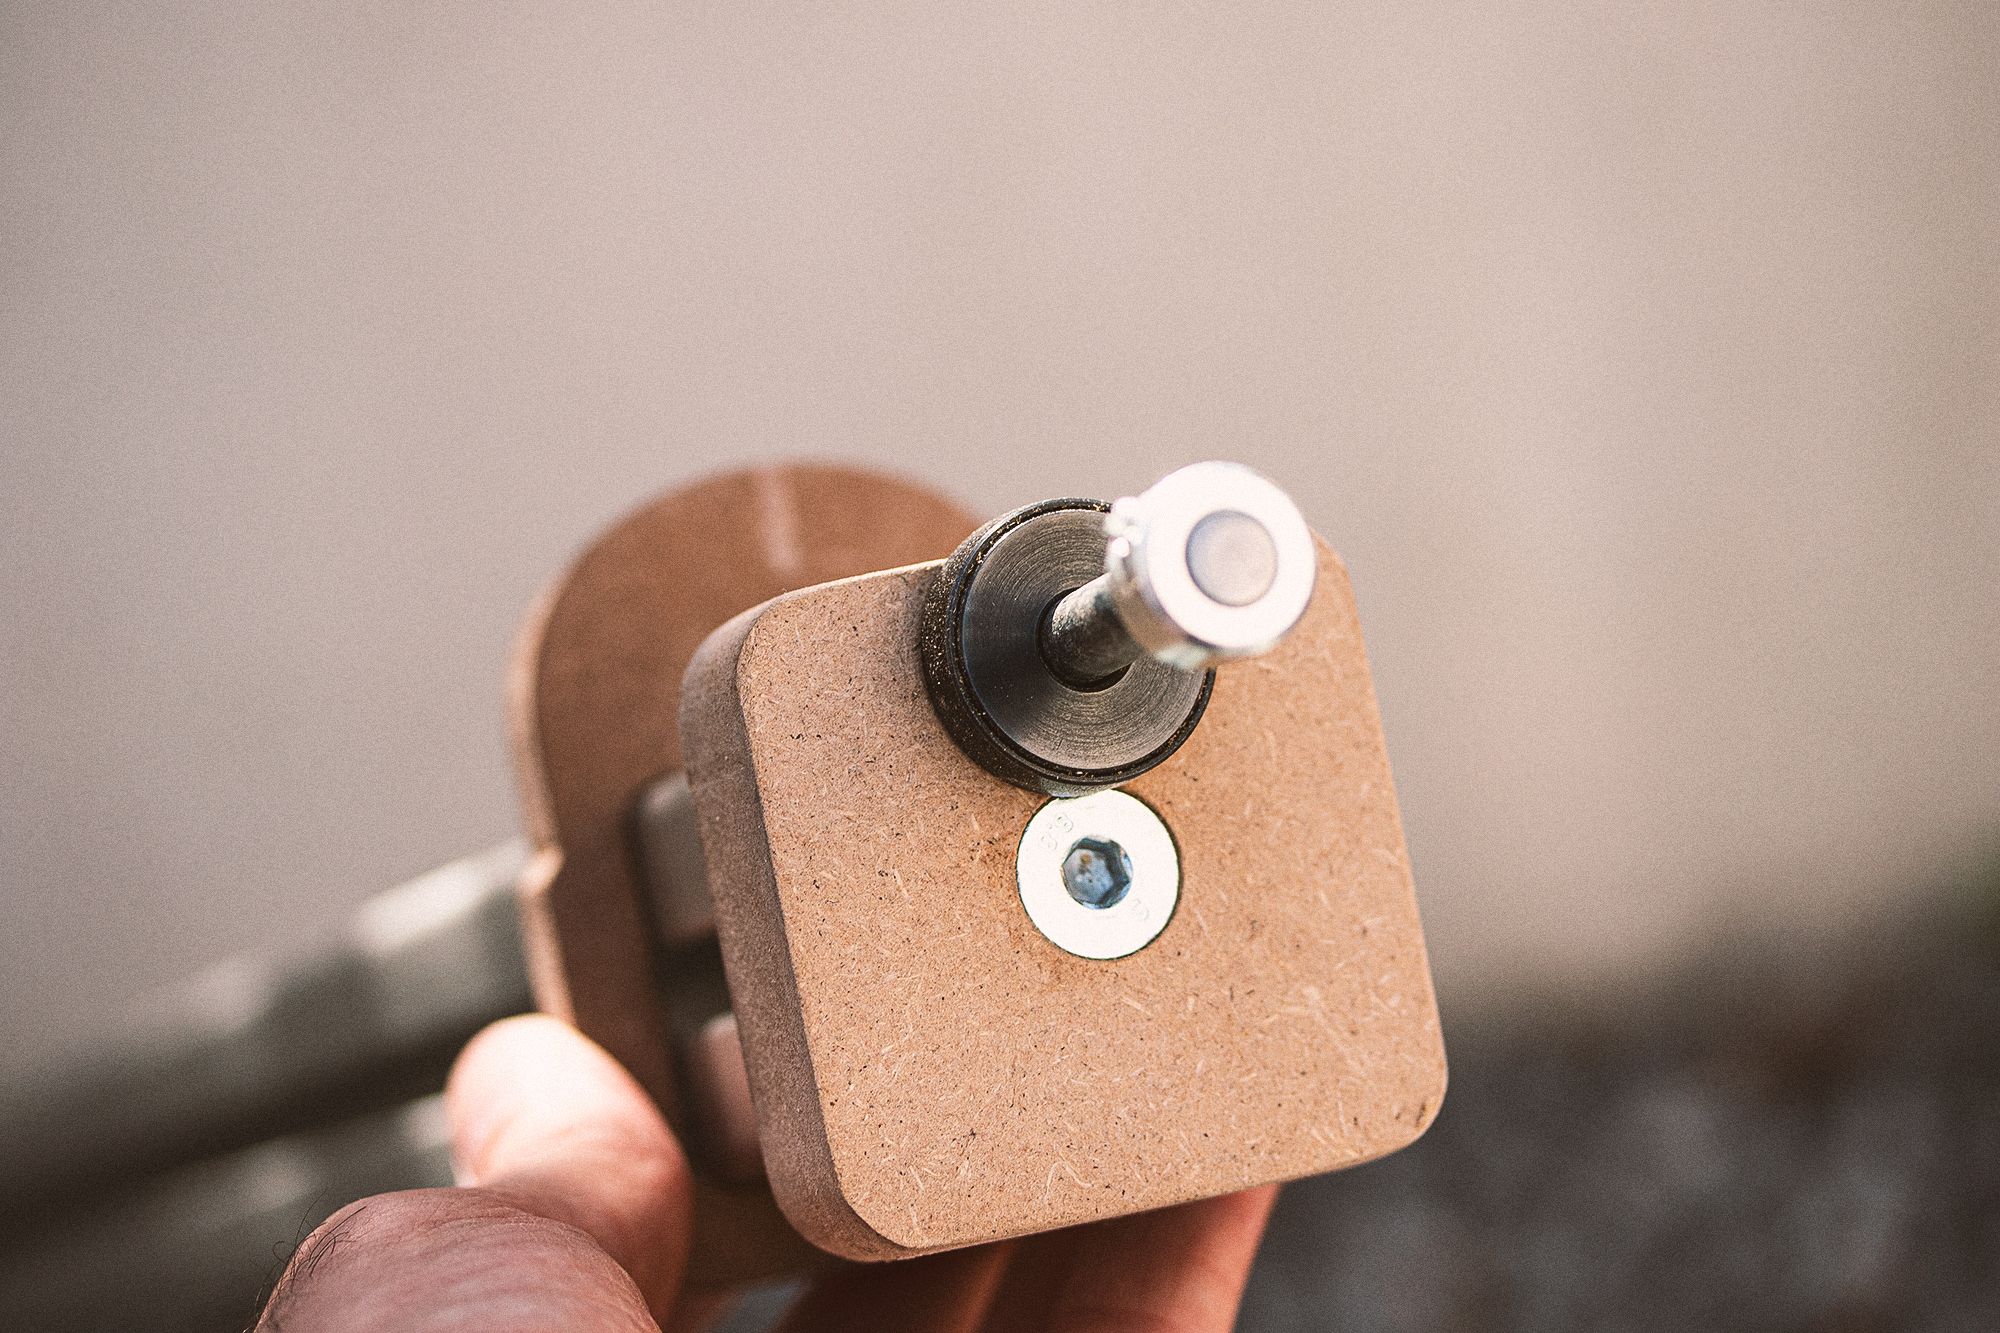
I tried different ways to attach the ball to the carrier plate. In the end I found an axle normally used for smaller wheels. It has a diameter of 8 mm and fits perfectly to the inner diameter of the ball bearing (8 mm x 22 mm x 7 mm). I used some super glue to fix it permanently.
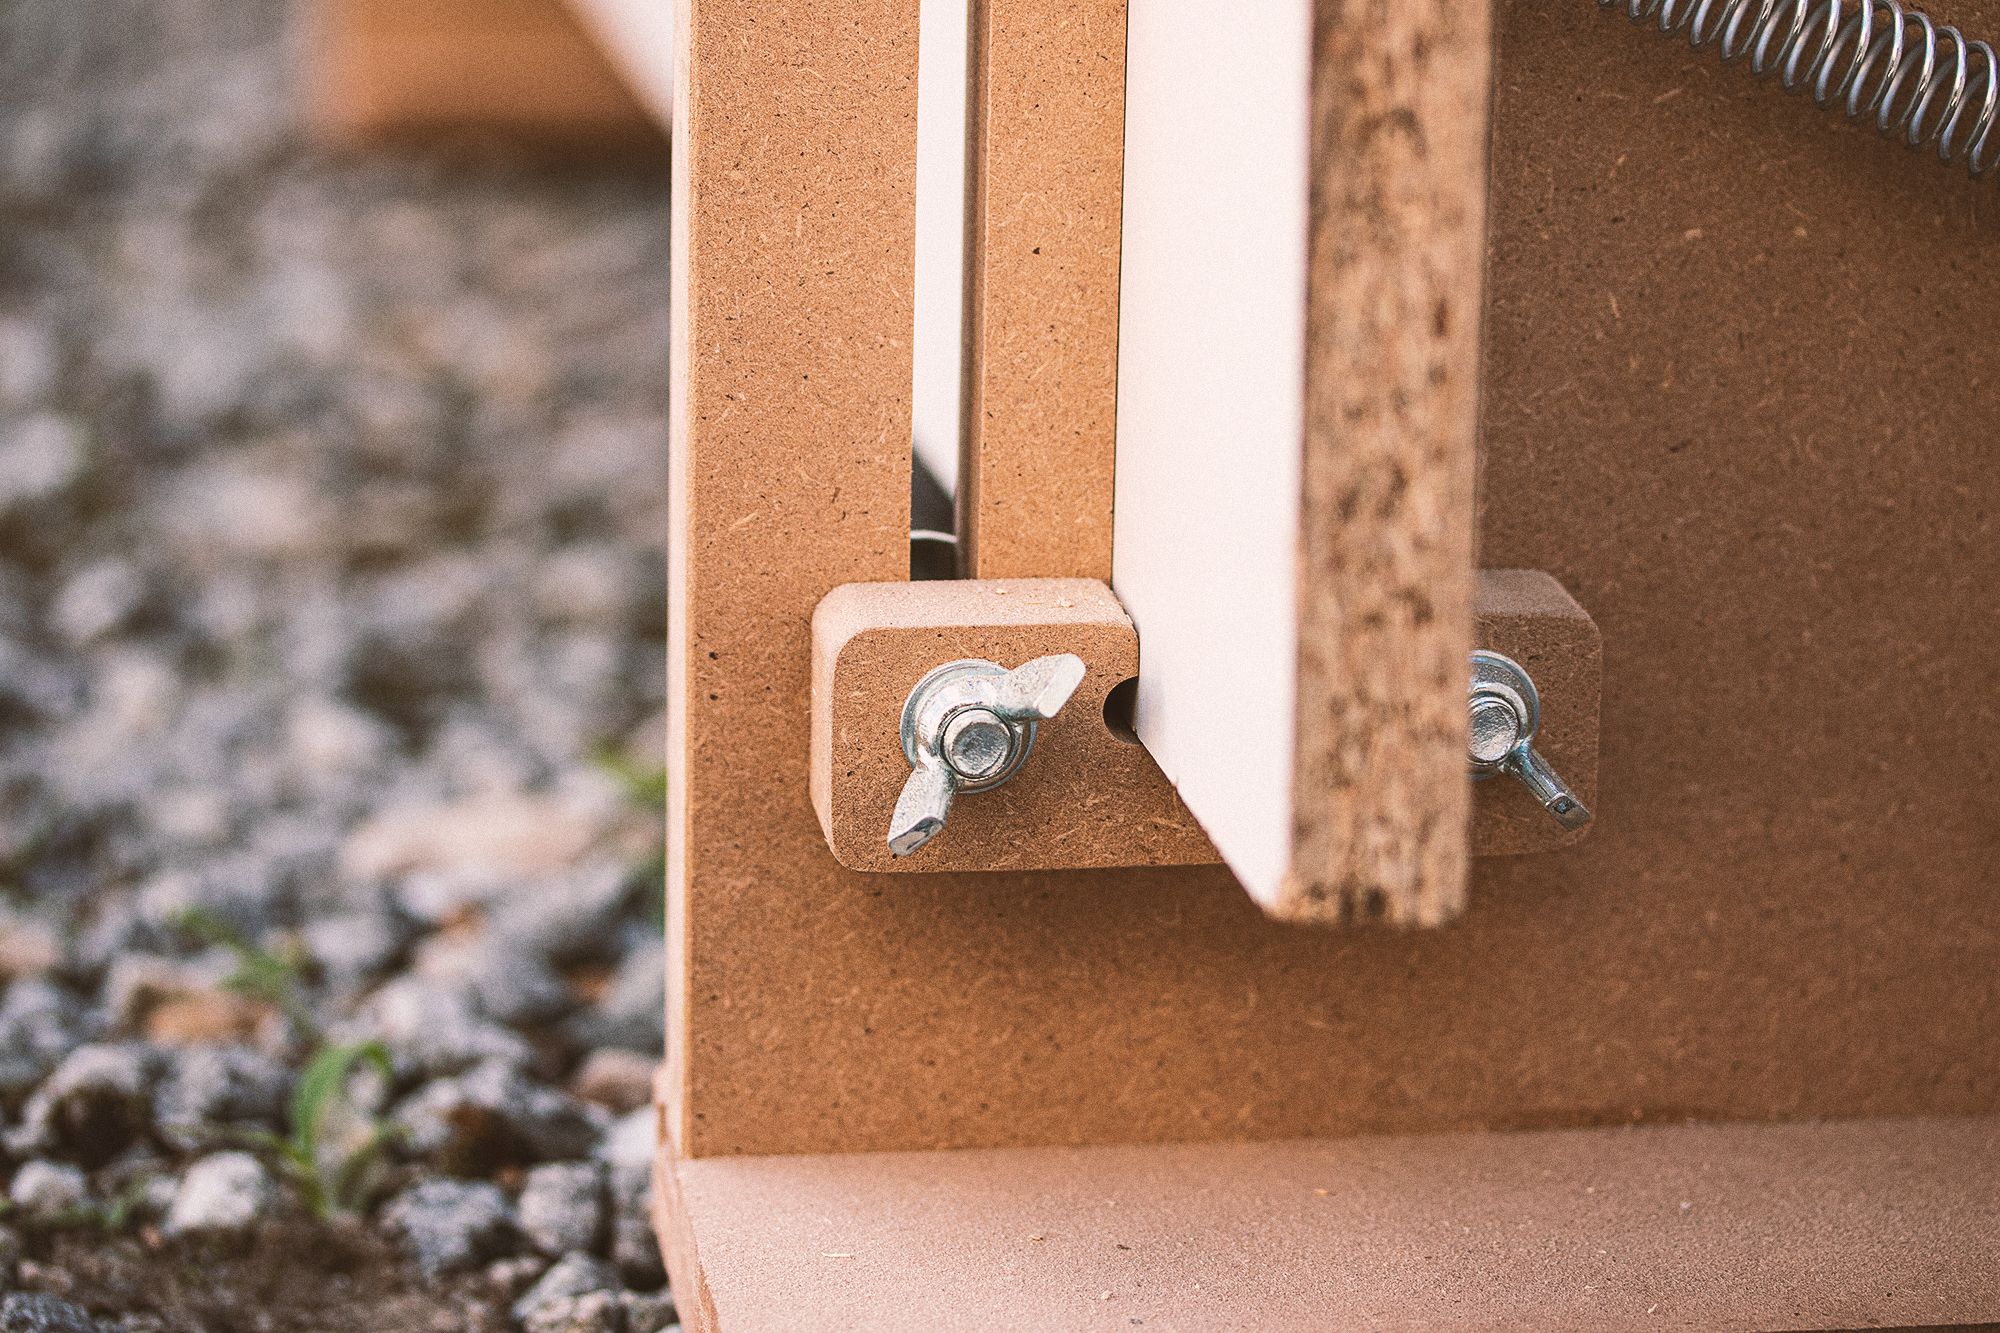
Two wing nuts are used for each depth stop. They must be tightened firmly as they hold the total weight of the construction including the router.
The self-adhesive abrasive 3M Stikit can help to increase the friction between the two parts.


Carriage rails and spring mechanism
The upper edge of the carriage rails is covered with a u-shaped aluminum profile. This allows the carriage to slide with less friction.
I didn't make any drawings or CAD files for the rails because they are basically just rectangular boards. I used a scrap of wood that was left over from a shelf.
The springs are attached with M8 machine screws. You can easily adjust the spring tension by changing their vertical position. In my experience, the top position is just right.
Carriage
The position of the carriage relative to the rails is fixed by 6 ball bearings (8 mm x 22 mm x 7 mm). Each ball bearing is fixed with DIN 912 M8 screws. They are easily accessible from above with a hexagonal wrench to finely adjust the position and prevent wobbling.

See it in action

To see this video, accept all cookies.
Conclusion: Enhance Your Guitar Crafting Techniques with a Neck Contour Jig
Although I couldn't list every single screw because most of the parts were just lying around in my workshop, I think this tutorial provides a comprehensive understanding of how to build your own neck contour template.
With these tips and tricks, you should be able to build and use your neck contour jig effectively and achieve the perfect guitar neck shape every time. Whether you're a seasoned luthier or a beginner guitar maker, a neck contour jig is an essential tool for any woodworking enthusiast.
If you have a Shaper Origin, you can download all the files needed for this build on ShaperHub. You can also follow the thread about this jig in the community.
If you don't have a CNC machine or a Shaper Origin, you can just use the SVG files and send them to an online service that will make the parts for you.
Have fun and success building and using your own neck contour jig!
This website uses Cookies
We use our own cookies and third-party cookies so that we can display this website correctly and better understand how this website is used, with a view to improving the services we offer. A decision on cookie usage permissions can be changed anytime using the cookie button that will appear after a selection has been made on this banner. More details